Sunday, May 8, 2011

Big Update

I have been a bit lazy in my posts lately so I need a big update covering everything I completed in April.  March and April saw really bad weather here in the South.  Tornados, high winds and bad storms.  I had Josephine under a 20' x 10' canopy but it was picked up in a storm fully intact and sent over a 20' tall hedge.  I found it hanging from my neighbors roof in the morning.


Poor Josephine suffered a torrential rain without her cover so I lost two weeks drying her out and figuring out how to get her into the garage.  My garage door is only 84" tall and she is 90" tall.  I ended up taking off her wheels and sitting the drums on two car dollies.  She rolled right in after that and is now safe and sound in the garage.


I cleaned up her hub caps and repainted the Scotty logo on them.  I think they turned out nice.


When I camp I have to sleep well.  The couch cushions would never work for my hubby and I so I decided we would have a permanant bed and give up the couch.  I got the top of the bed frame finished.  I will add two drawers underneath for extra storage.  I will also have the water tank and water pump under there as well.  This way the water pump will be insulated a bit from making too much noise.


I also made some headway on the kitchen cabinets.  I am going for the vintage cottage look so the cabinets are distressed and glazed.  The backsplash looks like vintage ceiling tiles and the hardware will be vintage as well.  I love the look so far!


To get this look I used one coat of primer, one coat of the lighter wall paint and two coats of the blue.  Then I sanded it down to rough it up a bit and rubbed on the glaze. 

Tuesday, March 15, 2011

More Progress

I just opened a Shutterfly account  and posted all my pictures here http://scottyhilanderrebuild.shutterfly.com/pictures/8  I will update regularly.  You know, with a blog you really don't need a scrap book because this serves as a journal and scrapbook all in one!

Ok, so the first wall is built and I couldn't wait to get it mounted. There were a few things that had to be done before I could get it done.  For example, the black paint you see along the bottom is Herculiner.  It is a bed liner paint that will prevent water damage.  I couldn't use treated lumber with the aluminum so I had to have an alternative.  The black part attaches directly to the frame of the trailer except where the wheel will be.


Second, the seams where the plywood came together were glued with biscuit joinery but they were not strong enough to stand moving them from the garage.  The 2x4 braces worked well to stabilize them and keep them from breaking while we were mounting the wall.


I attached a 2x4 to the bottom of the frame earlier to serve as a shelf while we mounted this puppy.  It was very heavy and I only had my son to help me so having braces installed helped.


I used 2 1/2" wood screws to attach the wall to the frame in several places. I always predrill because the worst thing that can happen would be to split the frame and have to go back and replace it. The wall fit front and back so that was a good sign.  I won't know if it is exactly right until the other wall goes up, the roof goes on and the skins line up.  This is what it looked like when it was mounted.  The boards are attached to keep the wall stable and plumb while I make the second wall.  The seam boards you see on the beadboard side will be hidden when the trailer is finished.


Tuesday, March 8, 2011

Making Walls

I am working on building the side walls now.  Scotty trailers side walls are made out of solid 1/2" plywood instead of framing.  Since the trailer is approx. 12 feet long I had to join together three 4'X8' pieces of plywood.  NOT an easy task.  I watched a lot of videos on the web learning about biscuit joinery, Gorilla Glue and pipe clamps.   Everything was set up in my garage and it was a tight fit for sure. I ended up having to climb under the wall and/or squeeze in front of the beer fridge to get to the other side.  The seams were reinforced with vertical 1x3s and some temporary horizontal 2x4 braces were added to the outside wall for stability when moving it outside to the trailer.


The next step was to use the original wall and/or aluminum skins to mark the circumference of the entire wall.  I learned that this is a very important step so taking your time and doing it correctly will save a lot of headaches in the end.  If you are off by even 1/8" then your aluminum skins will not fit properly and you will have leaks.  I used a jig saw blade in my Black and Decker Alligator to cut it.  My old jig saw finally bit the dust and I found this one worked alright....not great, but alright.  I think it would have taken a lot less time had my jigsaw worked.  As I look at this picture it looks like I might fall thru once the piece is cut but I made sure I was braced with the saw horses and separate pieces of plywood!  I always use safety glasses and respirator...the stuff they use to make and cure plywood is known to cause cancer and I have seen too many people in my office with eye injuries from not wearing safety goggles.


Once the wall was cut out I wanted to add beadboard on the side that would ultimately be the inside of the trialer.  This is a vintage trailer but I am not interested in restoring the fake wood paneling that was original to the trailer so this will be a customized job.  I want it to be like a rolling cottage so the beadboard will be a nice touch.  Here are a couple of key points I had to consider before taking this step:  I couldn't make the walls wider than they were originally and any added weight would need to be distributed evenly over the frame.  Apparently adding weight to one end or the other can mess up the balance of these trailers and cause bad things to happen.

So, I had to make sure that the bottom of the wall and the area where the wheel well resides did not include the added thickness of the beadboard.  Here is a picture of the area left only a 1/2" thick.  I made sure I had at least an extra inch of 1/2" area just for some "wiggle room" for when the walls are ultimately attached to the trailer.   I attached the beadboard to the plywood with Gorilla Glue and lots of staples.


You can see one of the vertical braces in place in this next picture.  The other one went on after this picture was taken.  I sanded the beadboard and in this picture it has one coat of primer on it.  Over the next couple of days I will add two coats of paint, sanding in between, and then a final antiquing glaze over the whole thing.   Lots of work for just one wall....It will take another week or two to get the next one done. I am not looking forward to mounting these things.  They are REALLY heavy so I'm gonna need to recruit some help!


Sunday, February 27, 2011

Floor Work

Well, the walls and cabinets finally came out and I am down to the floor and trailer frame.  I had to have a friend come and spot weld one of the braces at the door threshold.  It had broken loose.  I ended up with four floor patches....the back two corners and back frame was replaced.  The door threshold was rotten and there was a hole in the floor where the battery acid had leaked.  I finished all the patch work/bracing then finished laying the new floor and I LOVE IT!


It is a new Armstrong product that was easy peasy.  Linoleum "planks" that link up with sticky edges and basically float on top of the old flooring.  I went with "country pine".  I love the rough hewn look of it.  I think it will go well with the beadboard walls.  I also think I will be able to easily match it with a natural stain on the birch ceiling.

I hit Goodwill AGAIN.  Here are a few of the things I picked up:


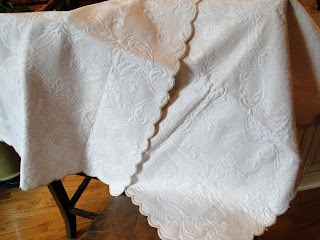
Brand new luxe pillow shams from Italy.  Really!  From Italy. They actually had tags still on them for....get this....$180.00 a pair!!!  Are you kidding me?  People actually pay that much for a pair of pillow shams???  I got them for $18.  I usually don't pay that much for things at Goodwill but they were brand new and very high end material so I snatched them up faster than lightening and danced a little jig all the way to the check out.  :o)

Vintage glasses for 50 cents each.  I picked up 6 of them.  I remember drinking out of these kinds of glasses when I was a little girl in the 70s.  Ours were green but I like the clear better. 

How about this vintage aluminum canister set for $5.  Very retro.  I don't know exactly how they will work in the trailer but I will figure something out....they are too cute.

Wednesday, February 16, 2011

Demo Days

Well, I was hoping that I didn't have to take down the side walls but the seam staples were rusted through, the top and bottom edges of the plywood were rotted and would need replacing.  I started taking down the walls piece by piece.  This is like one giant puzzle and I can only hope that the pieces are going to fit back together once that day comes. 


I plan to go with beadboard on the side walls.  I am using Gorilla Glue and staples to layer 1/4" beadboard on top of the 1/2" plywood for the replacement walls.  It will be heavier when completed but as long as I distribute the extra weight evenly then it should not be a problem.  The next few weekends will be focused on getting all the panels built, pieced together and then cut out.  My sixteen year old son is helping....he loves using the air compressor and staple gun!  I really enjoy his company while we build.


I also have a few spots on the floor that need to be addressed.  The back corners were rotted so I have some repairs there.  The framing on the back of the trailer will also be replaced.  I have to be careful because the linoleum used in these older trailers has asbestos so sawing through it is not advised.  I have gently been peeling it back where I will be making cuts and wearing safety gear. 

I'll just tell it like it is...the roof was a flat out pain in my booty to get off.  I am only 5'4" and small so lifting it off by myself was a job.  I ended up pushing up from the inside, dog cussing the whole time, and sliding it forward little by little.  Eventually gravity pulled it on down the front end.  It will be replaced with a seamless piece of aluminum ordered from a shop in town that repairs tractor trailers.  It will cost $14 per linear foot so I estimate maybe $200 worth of aluminum all total.


I also scored some vintage coffee mugs at the local thrift store for 50 cents per mug.  Aren't they cute?  I picked up a few other cool items that I will show off in some later posts.  Gotta love Goodwill!


Sunday, February 6, 2011

Peeling back the onion

Well, my initial plan for this trailer was to make a few repairs, decorate her and go camping.  I have seen pictures of other's projects and wondered to myself "why did they buy a trailer and then tear it all down?"  Well, now I know....because that is where I am heading very quickly.  I don't want to go there but the water damage was more than I expected and I only want to do this once. I took off the front and back skins and saw all the slats had to go.  "OK, I can do that...at least the floor is good."  Then I saw where battery acid ate through the front right corner. "OK, I can repair that....at least the sides are good."  Then I saw where 2" along the entire bottom and every seam in the side was rotted.  "Darn, I don't know if I can do THAT!"  YUK.
This is a real delimma because the Scotty has solid 1/2" plywood with laminated paneling on the inside. Anywhere I patch with not have the paneling on the inside and will be hard to hide the repair.  I'm gonna get the roof and the rest of the skin off today and see if I can pull together a suitable game plan that DOES NOT involve taking down the sides.

By the way, I honestly do not know how I would get this project done if it were not for the help of a very cool woman out in Washington who has managed to restore eleven vintage trailers!  She gives me advice and direction along the way. The internet is a wonderful resource and I met her through a vintage trailer repair forum.  There is a wealth of information out there for anyone who wants to learn. 

OK, so my favorite part of this whole project is planning the decor for the inside of the trailer.  I'm going to go for something I call "Vintage Cottage Glam".  I don't have it all worked out yet but I have pulled a lot of magazine pics that I like and they all have a common theme.  Beadboard, reflective surfaces like stainless steel, mirrors and crystals, warm variations of white with pops of turqoise (which will go well with the outside color of the trailer).  One thing I have decided...I will keep everything neutral so that I can easily change pillows and curtains with pops of color to change the look inside.  I have a long road ahead of me before I am picking out curtains but thinking about them keeps me motivated.


Sunday, January 30, 2011

First Evaluation

My vintage Scotty has been home for a week now. Our HOA doesn't allow trailers or boats in the neighborhood so I had to covertly hide her behind my house so I can work on her.  She is right next to the chicken coop.  No, chicken coops aren't allowed by the HOA either...and when they have five laying hens as permanent residents it is practically a felony.  We have a tall wooden fence surrounding the back yard and a bunch of tall trees. So far so good.

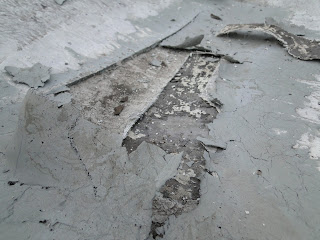
My Scotty has never been restored so I expected to have some repairs to make before I started the fun part of decorating the inside.  These pictures are of some of the damage I found upon closer inspection of the trailer.  The first picture is a wet/rotted spot on the inside ceiling.  There were two of them.  I quickly learned that when you are looking at water damage on the inside it is literally the tip of the iceburg.  Water rots everything in it's path and I was staring at the END of the path.  So...... I ventured to the roof and found this...

and this....
So many layers of goop that it would take me months to scrape it all off.  One of the previous owners had screwed through the metal roof about 37 times with screws that went no where and each one had dripped water into the interior. 

Since there were so many screw holes I decided I needed a new roof.  An intimidating task since I have never replaced a roof before.  Call me lazy but I would rather learn something new than scrape off all that GOOP! YUK.